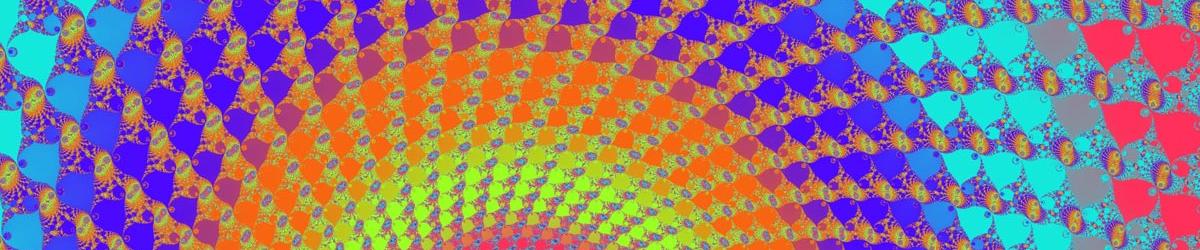
Banded Colour Layers are defined by a sequence of colours. The minimum dwell covered by the Layer is set to the first colour in the sequence. Thereafter, as the dwell values increase, the colours move through the sequence, passing smoothly from one to the next. Finally, after the last colour in the sequence, the Layer goes back to the beginning.
For example, if a Banded Colour Layer is defined with 3 colours: Red, Yellow and Blue, the layer starts with Red-coloured pixels. Then, as the dwell increases, the colours move from Red, through Orange, to Yellow. As the dwell value increase further, the colours move from Yellow, through Green, to Blue. As the dwell values increase still further, the colours move from Blue, through Purple to Red again. And so the next cycle begins. The rate at which the dwell values move through these colours is designed so that the colour-scheme looks similar at all magnifications.
In addition to defining the colours, you can define the width of each colour band. You could, to take the example above, define the move from Yellow to Blue to take twice as long as the moves from Red to Yellow and from Blue to Red.
To set up a Banded Colour Layer, the screen looks like the one below:

- To change the colour of a band, click on the coloured square and set the new colour
- The width of the band is the number displayed inside the square. This represents how long it will take to move from the colour that displays the number to the next colour. To increase this width by one, click on the small "plus" sign in the bottom right hand corner of the colour square; to decrease by one, click on the small "minus" sign.
- To move a colour band further up the list, click on the button displaying an up-arrow. To move a colour band down the list, click on the button displaying a down-arrow.
- To delete a colour band, click on the button displaying a red cross beneath the square for that colour band.
- To enter a new value for the width of a colour band, click on the small edit button beneath the square for that colour band. This may be easier than repeatedly clicking on the plus and minus signs.
- To insert a new colour band, click on the empty square displaying a star-sign (*). You can only do this if you have defined fewer than the maximum of 12 bands.
Beneath the square which denote the colour bands is a small picture showing how the colours will move through the bands you have specified. This updates as you change the bands, so that you can see the effect of changing the colours or changing the width of the bands. Beneath this picture is the minimum dwell value at the left-hand side, and the dwell value that will be reached by the time the first cycle through the colour bands is complete. In the example shown above, the first cycle through these bands will start at a dwell of 5, and will finish at a dwell of 100 when the cycle starts again.